Rigged Characters

Judah Mantell
Last Update 2 years ago
SceneForge accepts humanoid model imports with skeletons rigs and can be used for posing characters using Inverse Kinematics .
Note that SceneForge now includes two "Stand-In" rigged characters that can be brought in through the Create Menu.
Working With Rigs
When bringing a rigged model into your scene, the properties menu will allow you to set up its rig. If SceneForge detects a fully rigged humanoid character with proper bone names, then you're all set!
You can now pose the character as you want and even apply preset animations.
Otherwise, you have to set up the humanoid rig manually. Doing this will allow you to pose the character using IK, but not apply preset animations. The rig detection system is always being improved upon with more and more humanoid rig types being accepted.
Regardless of rig type, you can also reset the pose of the character to the way it was when imported.
Setting Up Humanoid Rigs
As mentioned above, if SceneForge detects a humanoid rig, then you're all set. To use the auto-rig-setup, when rigging your character, you can use the following naming conventions.
In this example, the Left Upper Arm bone will be used, but if you follow these naming conventions for all key bones in the body, SceneForge should detect the rig. They are case insensitive.
| LeftArm |
| L UpperArm |
| L_UpperArm |
| UpperArm.L |
| L.UpperArm |
| Upper_Arm.L |
| L.Upper_Arm |
| UpperArm_L |
| L-UpperArm |
| UpperArm-L |
| L Shoulder_ |
| Left Arm |
If you have a humanoid skeleton that isn't supported, feel free to email the file to Support@SceneForge.app so we can add support for its bone names!
If a humanoid skeleton is not automatically detected, you have to set one up manually.
To do this, you can use the humanoid rig setup menu found in the properties panel:
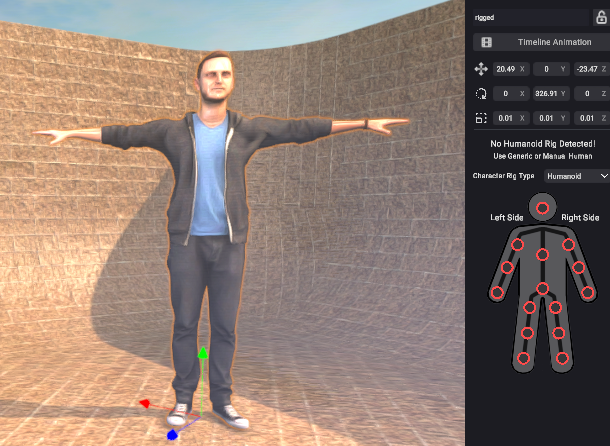
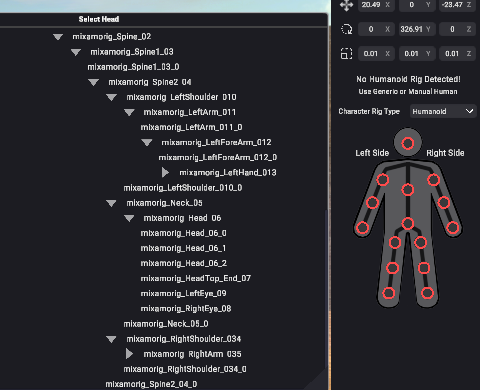
To bind bones to the humanoid skeleton, click on one of the red circles corresponding to a required humanoid bone. A bone selector menu will popup, which allows you to choose which child bone will be used. Once the entire skeleton is filled with correct bones, the humanoid character is ready to be used.
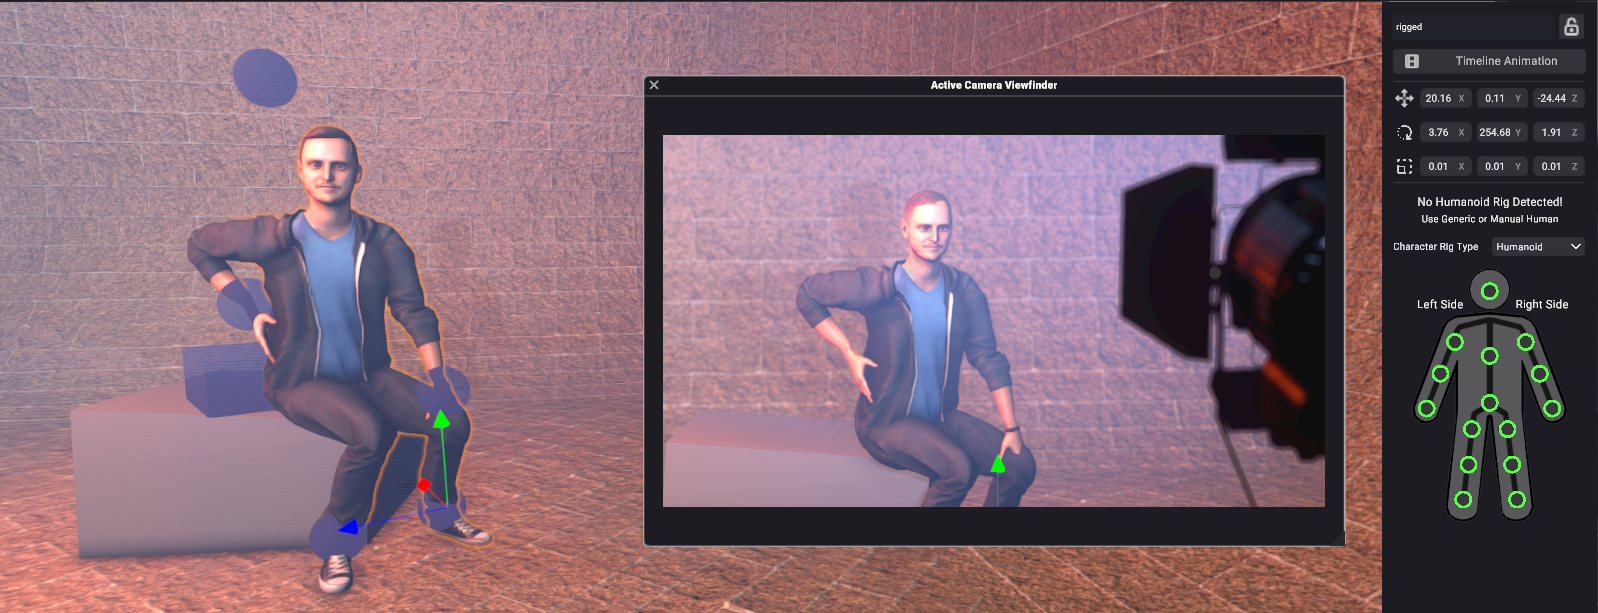
Once it is, a human body manipulator rig will be added. This is comprised of movable spheres for the head, arms, and legs, and a cube for the torso/pelvis.
Posing Characters
Once the character's rigs have been set up, you can pose and animate them in two ways: using IK, or using preset animations.
Using Gizmos
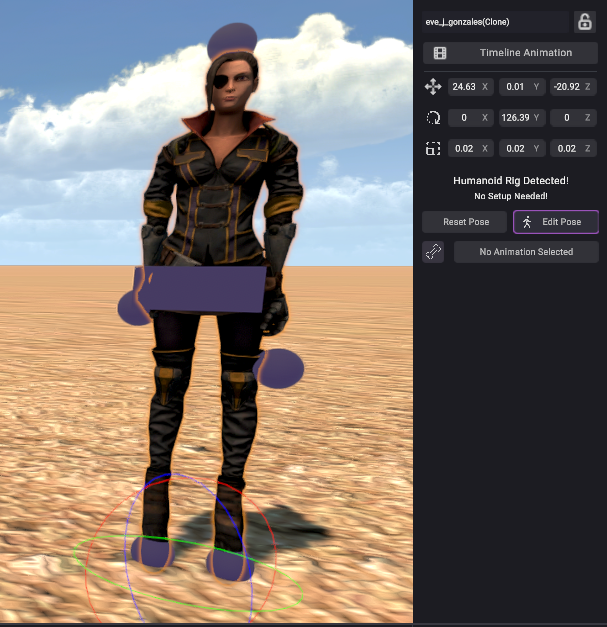
To pose the character using gizmos, click the "Edit Pose" button and the gizmos will show up at the key bones of the human body.
To pose, simply click and drag these gizmos to move the character's limbs. When a gizmo has been clicked on, you are able to rotate the bone precisely.
Because dragging the gizmos only occurs on the X/Y plane of your computer monitor, you will have to move the editor camera around to get a better view. While pose editing is enabled, you can also reset the pose back to the default "star pose".
Click the "Edit Pose" button again to end editing.
Using Animations
The other option is to use one of the included animations. This only works for auto-rigged characters, as mentioned above.
To set the animation, click on the animation selection button in the object's properties panel.
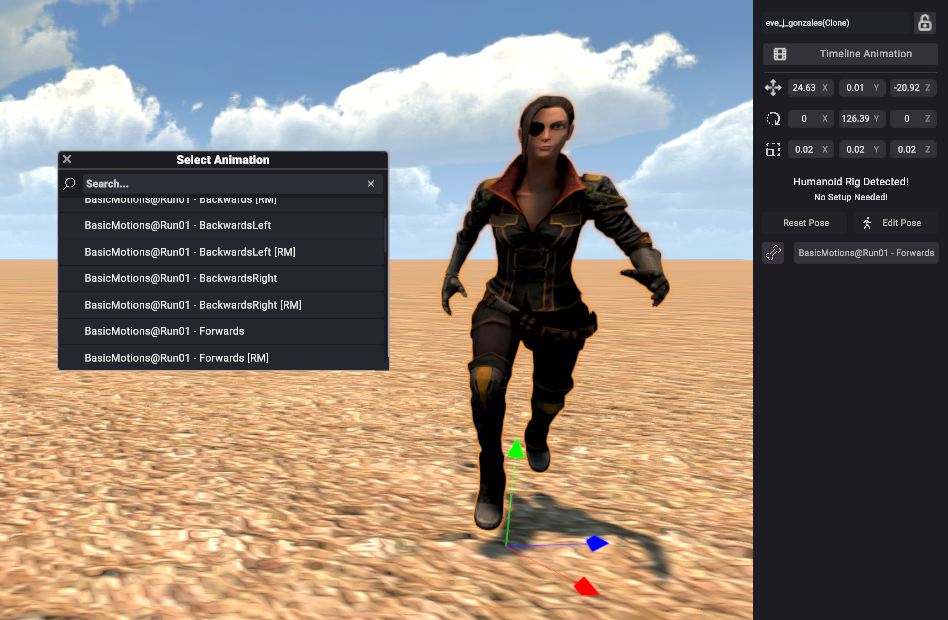
Then, you can use the popup window to search for an animation that you want to use. SceneForge includes hundreds of animations of different common actions, so try searching for one, and it's likely included!
To make the character use the IK pose instead, click the little bone icon button.
At the moment animations are simple looping poses or actions, but in the future, they will be fully integrated into the timeline system for creating animatics!
Was this article helpful?
That’s Great!
Thank you for your feedback
Sorry! We couldn't be helpful
Thank you for your feedback
Feedback sent
We appreciate your effort and will try to fix the article